
Kodak Vision3 500T 7219 16mm Redscale

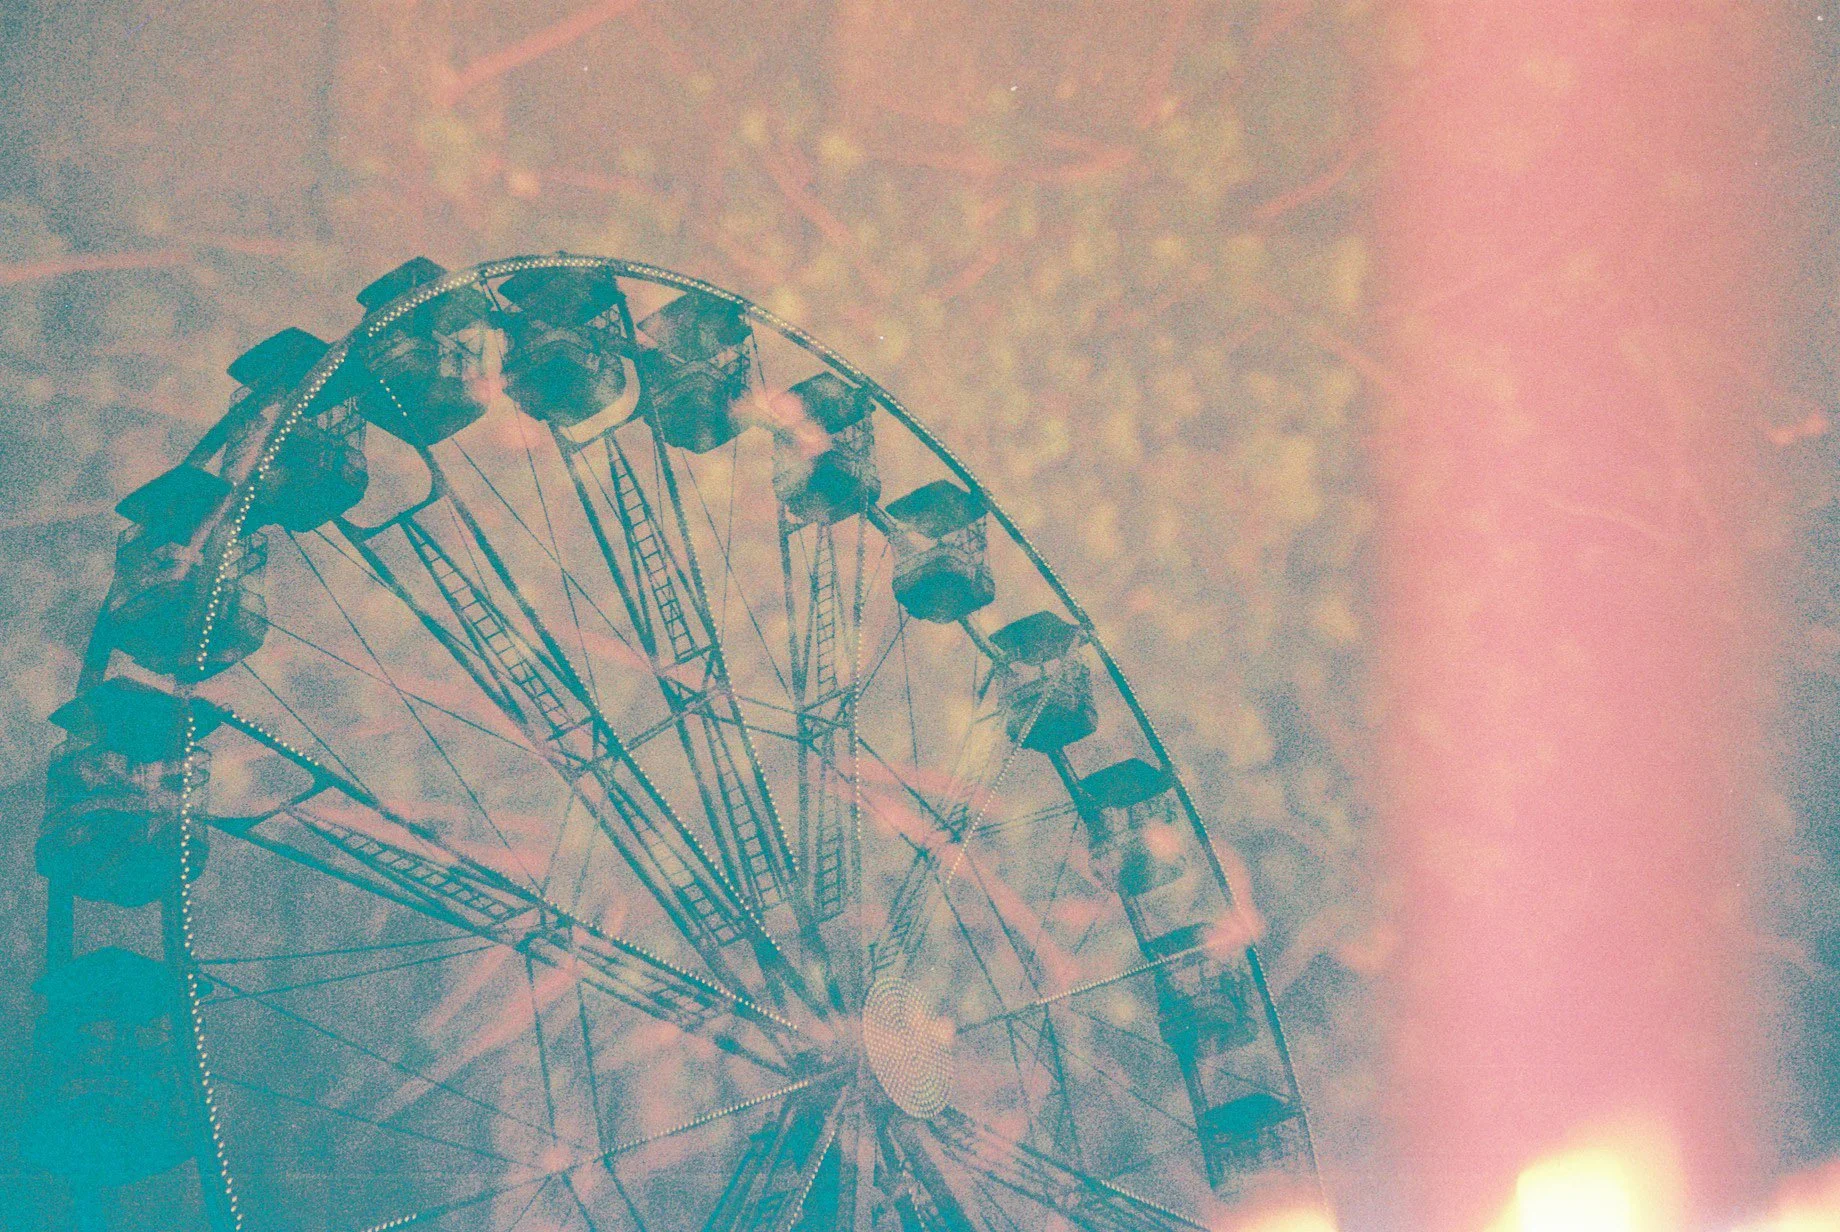
Fabio in the Dublin Docklands
What is Redscale?
Redscale is nothing more than colour film put into the camera the wrong way round. That's all, it's very simple. And yet, doing this produces a very distinctive look. You could have the most neutral colour film, but once you shoot it back to front, you get incredibly warm images that are overwhelmingly red. Hence the name, redscale. But why does something so simple produce such intense results? Is there any benefit to shooting film this way? And how did I go about it for my short film Red Lemonade?

One of the most liked images on Lomography
Although it's hard to say where the supposed origins of the technique began, it almost certainly emerged as a mistake. It's easy to do in large format photography by putting plates into the camera the wrong way round. And it can easily happen by accident when loading motion picture films into cameras. This is especially true if the film has perforations on both sides like 35mm, 65mm, double 8mm, and early 16mm film stocks.
The great thing about redscale is that unlike cross processing or bleach bypass, it isn't an alternative processing method at all. You simply expose the film back to front and process it in standard chemistry. Meaning a photographer can achieve the effect without processing the film themselves and can give it to any film lab such as their local chemist.

Emulsion side in to emulsion side out
It's hard to say who first coined the term “redscale” but Lomography is likely the culprit. Not only does the Lomographic Society embrace analogue techniques such as this, but they probably gave it a name for the sake of marketing. They alongside other brands such as, Rollei, and CineStill sell products labelled as redscale. Whilst there is nothing wrong with purchasing these films, I think it's unnecessary and goes against the true appeal of redscale, as you can apply this effect to any colour film using nothing more than scissors, Sellotape, and a darkroom or a changing bag. You can read this blog to find out how.

Don’t bother with this, just do it yourself
Why does it look like that?

Roald Amundsen at the South Pole 1911. Notice how dark the parts that are supposed to be red on the flag of Norway.
It has to do with the science and the construction of the emulsion itself, but first a bit of history of film emulsions.
In the beginning, film emulsions only captured rather short wavelengths of the electromagnetic spectrum. The first films could only capture blue light, so we call them blue sensitive retrospectively. Actually, they could capture quite a bit of UV light too, but more on that later. Before the challenge of reproducing colour truthfully with film, the challenge was to create emulsions that could capture all the colours in the first place. Capturing longer wavelengths of light to better reflect what the naked eye sees of the visual spectrum, at least in a tonal sense. Eventually, emulsions managed to capture blue and green light, known as orthochromatic. Then by 1922, emulsions could now capture blue, green, and red wavelengths of light, called panchromatic. In this respect, today's black & white and colour films are essentially the same. They both capture colour using three separate layers. The only difference is colour negative film contains yellow, magenta, and cyan dye couplers on these respected layers that create a full colour image when printed.
However, despite these developments, a problem persists. Film emulsion is still inherently sensitive to rather short wavelengths of light, including UV. A minor issue of this is that ultraviolet light appears on landscape photos looking like a haze on very bright sunny days. So, if you ever wondered what those seemingly pointless UV filters are for, there's your answer. But the real issue this poses is, how do you truthfully capture green and red light with layers of emulsion that are still sensitive to blue light? The solution lies with the film's construction. Observe this diagram I took from a datasheet.

From the Fuji C200 datasheet
As you can see the emulsion stacks the layers with blue at the top, followed by green and red. This is the order the light passes through the film during an exposure. However, there is a yellow filter that sits between the blue and green layers, and its purpose is very simple. The first layer that reacts to light is the blue layer. It's only sensitive to blue light so it should only capture blue light. But after that, the light passes through the yellow filter. Because it's yellow and fairly dense, it allows most wavelengths of light to pass through but restricts blue light. Therefore, by the time the light reaches the green and red layers they should capture enough green and red light on their own to create an adequate exposure without capturing too much blue light to be jarring. Problem solved, a full colour image that reflects what the naked eye can see. That is if you capture exposures on the emulsion side of the film.
If you somehow inverted the construction, and expose through the anti-halation layer instead, something different happens. The purpose of the anti-halation layer is to stop light from bouncing off the back of the film gate to prevent blooming highlights and stop unwanted light exposing the film when wound up. In this scenario, it doesn't do that at all, it instead stops light in front of the emulsion, like a neutral density filter. Well, not neutral, but a red-orange hue. Secondly, the shutter exposes the red and green layers first. And this is without the yellow filter, therefore capturing blue light and reproducing it incorrectly as more red and green. But most importantly, the yellow filter blocks blue light from reaching the blue layer itself. Given how dense the yellow filter layer is, you'd have to expose quite a lot of light to reproduce any blue in the final image.
When combining all these factors, you would get an exposure that leans towards red due to the slight hue of the base. Very saturated reds and greens due to reproducing blue light incorrectly. And a very warm appearance due to the significant lack of blue in the final image. That appears to be what happens when you redscale a film.

You’ll find no blue here
How to shoot redscale

Thank you ξαβλ for this
There are some more interesting effects that occur with this process. One is how colour varies depending on the amount of exposure the emulsion receives. Because of the various densities within the construction of the film when shot this way, exposures yield slightly different results with every stop. Starting with when the negative is quite thin, images are almost monochromatic with nothing but different shades of red. Exposing by an extra stop starts to engage the green layer, bringing in some orange. The next two stops produce very warm analogous images, with scenes captured in nothing but reds, oranges, and yellows. It's this range that is most desired by photographers and considered as an adequate exposure in redscale. Exposing beyond this by many stops also produces usable images. Eventually, overexposing the film by obscene amounts cancels out most of the effects of redscale with enough light breaking through to the blue layer. It's also at this stage where images start to lose saturation. Because of how dense the anti-halation layer is, and how gradual the gamma curve is for colour negative film, there is practically no limit to how much you can overexpose with redscale.
Another effect that occurs, particularly with thin exposures, are blue and cyan shadows. I don't really know why this happens. It is as if someone flashed or toned the film with blue or cyan, fogging the image a little to bring up the exposure. I thought it has something to do with the anti-halation layer coiled up on the inside of the film instead of the outside where it normally is. Normally, the multiple layers of anti-halation protect the latent exposures from small amounts of light fogging the film. This doesn't happen with redscale, so fogging occurs and happens mainly on the blue layer and a little on the green. Well, that’s what I thought, but now I’m not so sure.
One name you'll come across when exploring redscale is Hodaka Yamamoto, or as he is more commonly known as Hodachrome. For years he has experimented with in camera double exposures with cross processed reversal film and redscale. His work is awe inspiring and you should check him out.

Beautiful
In this blog Hodachrome suggests shooting redscale on overcast days in preference to sunny days for a couple of reasons. One is the increased latitude in the image, with the redscale effect emphasising the gradation between difference brightness levels in subjects such as clouds. Another is the bright blue sky permeates through the reversed layers to create some yellows and even greens resulting in a much wider but less harmonious spectral range. Whereas in overcast, the lack of blue in the in exposure contributes to a warm analogous palette which he prefers for his work. Using redscale in this scenario lends to a completely different feel between the scene captured and the final image. Drab grey overcast days become engulfed in warm vibrant reds and oranges. Or as Hodachrome describes in his blog "redscale film is like sunshine in a canister!". He suggests other tips such as shooting at sunsets and taking advantage of backlighting. All of which he uses to create his impressive body of work.
Redscale is not a good idea.
As you can probably guess by how intensely garish the results are, not many cinematographers use redscale. At least not deliberately. Neither is there really any practical advantage for doing it with the all the tools that come with camera and lighting set ups. Even if the effect is desired, there are plenty of better alternatives to consider. You can achieve a similar effect in camera by putting Wratten filters on the lens or on a matte box. If that's not enough, gelling lights, windows, and other light sources can help create the effect. It's even easier to recreate in post. If for some reason your process is completely analogue, excluding blue from printer lights and adding more red when making prints will yield a similar and more controlled effect. But as you are likely to be creating a digital video file by the end of all this, the best way to get the effect is though digital grading.
Here is an example of how to do it in DaVinci Resolve. Open up the Color tab and select Curves, and edit the RGB values separately. Starting with the blue value, lower the top part of the curve to the bottom to remove all blue values in the image, then raise the bottom part of the curve slightly to fog the shadows with blue. For the green layer, reduce the highlights by lowering the top part of the curve until it reaches the look you desire. The less you adjust it the more the image resembles overexposed redscale, the more you lower the green value, the more it looks like underexposed redscale. And to oversaturate the red values, take the top part of the curve and move it to the left until it reaches the look you desire. Here is an example below.

This only took a couple of seconds.
Whilst there are basically no practical advantages with redscale, there are many drawbacks too. A minor one, is the fact that because you are shooting the film the other way round, images appear flipped when printed or scanned normally. Flipped left to right if the film progresses though the gate horizontally, and upside down if it passes through vertically.
A very inconvenient drawback is how redscale changes the flange distance. The focus point will appear to be behind the subject when focusing normally. You have to faithfully rotate the focus ring a few degrees to counteract this. A large amount of my footage was completely out of focus on this project, particularly on shots where I think I had the ring focused to infinity and I stopped down the aperture pretty well. These are situations where it’s near impossible to end up with footage out-of-focus and yet it looks like I had the focus ring twisted all the way to the other side. So, I’d say the change in flange distance was reason behind most of my out-of-focus shots, or I’m a complete idiot and I set up the lens wrong.
One drawback I was particullarly concerned about before committing to redscale for this project was actually the exposure, and it's because of the anti-halation layer. In this context it acts as a not-so-neutral density filter. So, the film is slower, which by default makes it less versatile. Now this isn't that much of a problem in still photography because you have more control over exposure as you can adjust the shutter speed and use a flash in low light situations. But you can't do this with motion pictures as shutter speed affects motion blur, and your lighting must be continuous. But another factor has to do with the film stocks themselves.
Colour negative film used in still photography has a very forgiving anti halation layer. The rule of thumb with these films is to expose at least 2 stops above the box speed to reach the adequate exposure in redscale. However, with motion picture film stocks like the Vision3 range that requires the ECN-2 process, the anti-halation layer comes in the form of remjet which is a lot more dense. From what I've found on this forum and this test on Vimeo shown below, to get anywhere near an adequate exposure you'd have to go above the box speed by at least a whopping 6 stops!
Even if you take Kodak's fastest offering of the Vision3 range which is 500T, redscale gives you a working film speed of just 8 ASA (500÷2^6 ≈ 7.8125). At that speed, it's comparable to putting print film into the camera, it's that slow. Oh yeah, and don't forget, motion picture cameras don't have the same versatility in exposure as still cameras. Unless you're doing something special, you should always be shooting at 24fps with a shutter disc around 180°. The Bolex I use has a fixed shutter angle of 144°, meaning it has a shutter speed of 1/60 secs when filming at 24fps (360÷144×24 = 60). You only need to apply the sunny 16 rule to realise how restrictive this is. To shoot 8 ASA with a shutter speed of 1/60 during clear sunny skies, the required aperture size is f5.6 (60÷8 = 2^3, 16÷sqrt2^3 = 5.6). So that doesn't leave much choice but to shoot as wide open as f1.4 for thick overcast and sunsets.
Why did I do this?
My first photograph with redscale

I guess I’m a cinematographer now
Originally my next personal project to take place in 2022 was going to be a documentary about the Linen Industry in Northern Ireland and shoot on Kodak Vision3 50D using bleach bypass. I had a 400ft of the stock, but 2022 came and went, the documentary never gained any traction, and the stock sat in my fridge unexposed. At the start of 2023, I became involved in a scene of cyclists in Dublin who share my interest in riding fixed gear. With it being in the same spirit as Quad Euphoria, I decided to make this scene the focus of my next personal project and commit the technique of bleach bypassing Vision3 50D to it. But then I got a phone call from somebody who presented me the opportunity to be the cinematographer for his short film Daylight Savings. I agreed to it, and over the course of the following weeks of the two of us discussing ideas for the project, we decided to use the 50D I had and bleach bypass it for his project.
So, what was I going to do for my own project involving the fixies in Dublin? The only natural progression I could think of for an alternative technique in colour film to follow cross process and bleach bypass was redscale. I hadn’t shot redscale for 5 years, not since I was first getting into film photography. I dismissed the idea several times in my mind because of how incredibly impractical the technique is. I didn't commit to any film stock until I finished shooting Daylight Savings. I had a feeling beforehand that over the course of shooting and processing the film, I would get fed up with the challenges of colour film altogether. And out of that frustration, opt for black & white for the film about the Dubliners and their track bikes.
But that's not what happened. Instead, I couldn't help but notice how often on the project I was using my ND filters. Specifically, my darkest one, that takes away 5 stops of light. I remembered being in the situation multiple times when filming Quad Euphoria, too. I shot Quad Euphoria on Ektachrome which was 100ASA, and I rated the film for Daylight Savings at 200ASA. So, the idea of shooting 500T and taking away 6 stops with redscale, didn't seem too impractical.
How to Redscale 16mm

You’re going to need one of these, a rewinder
As mentioned before, a camera loader can easily redscale motion picture film by accident if the film has perforations on both sides. This is true for 16mm film stocks before the transition in the 1950's to single perforated film. Because today's stocks have perforations on one side only, it matters that the film is wound in the correct orientation. Whether the film comes on a 100ft daylight spool or a 400ft core, the perforations must be on the right-hand side when the leader reels downwards and is facing you. L. Bernard Happé refers to this orientation as B-wind in his book Your Film and the Lab. A-wind is when the perforations are on the left-hand side, as they would be after exposing a roll in the camera and the film ends up on the take up spool. This is a good thing as it means a loader can't accidentally redscale a film because the sprockets and registration claw can't engage with the perforations as they will be on the other side. This makes it a challenge to deliberately redscale 16mm film.

Thanks Happé

A 400ft reel compared to a 400ft core
For this project I spooled four 100ft daylight spools from a 400ft roll on a core in total darkness. That means starting with a 400ft core that is B wind, emulsion side in and ending up with 100ft spools that are B wind, emulsion side out. This involved rewinding the film. One of two things happen when you rewind a roll. When reeling from one roll to the other, if both rolls spin the same way, the wind will change but the emulsion will remain on the same side. But if one roll rotates clockwise and the other anti-clockwise, the emulsion will flip sides and the wind remains the same. On my previous project Daylight Savings, I rewound the entire 400ft core onto a 400ft reel, and then rewound the reel onto the four separate 100ft daylight spools that I put into the camera. The emulsion remained on the inside throughout, so the film went from B-wind on the core, to A-wind on the reel, to B-wind on the spools. For this project even though it was possible to just rewind to the spools straight from the core, there is more control and security by putting it onto a reel first. This is for a few reasons. For one, because it's just a core there is little to stop the film reeling out sideways whereas the walls of a reel or a spool enclose the film. Another is, a core simply has a hole in the center, whereas reels and spools have square slots that fit onto a rewinder that allow you to rotate the rolls with handles. And finally, the 400ft reels have embossed indicators for the footage amount. This makes it easier to tell by feel when you've loaded 100ft onto a daylight spool in total darkness. So, to redscale four daylight spools, I rewound the film three times. From core - emulsion side in, B-wind - to reel - emulsion side out, B-wind - to reel - emulsion side out, A-wind - to spool - emulsion side out, B-wind. Confused? Well buckle up then because we aren't done there. It's time to talk about how I exposed the film from both sides!
Exposing redscale on both sides.

Hodachrome, the master of EBS
A technique I used in Daylight Savings was double exposure. It was fairly simple to do, and the results were predictable. All I had to do was rewind the rolls in darkness using the rewinder after shooting them once and place them in the camera again. I did the same thing for one roll in this project, but I rewound in the opposite direction allowing me to expose on both the emulsion and the base side of the film. Hodachrome has created many still photographs where he exposes film from both sides which you can find here. But knowing what exactly to expect with this method on motion picture film stock in this project really pickled my head.
To explain let’s start with some basics of how motion picture film cameras work. Film passes through the gate vertically. Well, apart from Vistavision and IMAX, but forget about those for now. Normally the shutter exposes the emulsion side momentarily. The lens flips the exposure vertically; therefore, the image appears right-side-up when viewed on the base side. The film passes through the gate top to bottom, but because of the flip, preceding frames appear above the current frame, and succeeding frames below.
Because today's 16mm film can only go through the camera if the perforations are on the right-hand side, you must rewind the film an odd number of times to expose through on the base. That means the start of the start of the film - the head - becomes the end of the film - the tail. So, when exposing the film on both sides, one set of exposures will play normally, but the other set appear flipped vertically and will play in reverse. You can flip and reverse the scanned video file in post, but regarding what the Bolex can do, there is really nothing you can do to make both exposures play right side up and in chronological order. You can roll the camera over by 180° and capture the images up-side-down. This won't offset the effect, but it will flip the image horizontally instead of vertically.
To utilise the full potential double exposure in a creative way you must understand how film emulsions work. The way that emulsions capture exposure, is by changing density. However, density is finite, and you can only add to it, not take away. These are important rules when taking multiple exposures in a creative way. To add more elements to the image, you must leave areas thin in the frame, but to subtract elements completely, you have to overexpose, leaving areas of the frame completely white. For Daylight Savings, the main technique of using double exposure was to super impose paper cut outs. I did this by underexposing the rest of the frame outside of the cut outs such as putting placing the cut outs on black felt. For this project, I wanted to use the latter technique, by capturing silhouettes in front of a tungsten light and smoke. Under the rules of density, silhouettes create negative space for other elements. I was hoping the result would look like a combination of Hodachrome's work and the music video for Canopy Climbers | Far. However, the result was underwhelming, I didn't expose the light and smoke of the silhouettes enough, and I think I exposed the other elements too much.
Conclusion
I could go into more detail about the challenges redscale posed to me on this project, but I’d prefer to evaluate whether it was worth it or not. Despite the challenges and other factors related to this project, more than half of the footage I captured was usable, which is a relief. Would I recommend someone else to put meters upon meters of motion picture film into a camera back to front with what is available? Probably not. The way redscale looks is the result of something so crude that you can easily recreate the style in post. If all you desire is the look, it’s so much more reliable to use colour grading without having to worry about exposure, compensating focus for flange distances, and unexpected results, whether you’re shooting on film or not. But if for you the appeal of film photography is the unforgiving discipline of committing to a style by predetermining it before shooting and embracing the unexpected, redscale in motion is the epitome of that commitment. But for me, after completing something of a trilogy of alternative colour photography in 16mm, I think I’ve had enough discipline, and now I’m looking to do something new that is a bit more convenient.
I’d like to thank the people from Fixed Gear Dublin who this short film is about. But above all else. I want to say a massive thank you to Hodaka Yamamoto, for his amazing work that inspires myself and many others around the world. Thank you for your time, and I hope you enjoy Red Lemonade.